feed_me_locally.
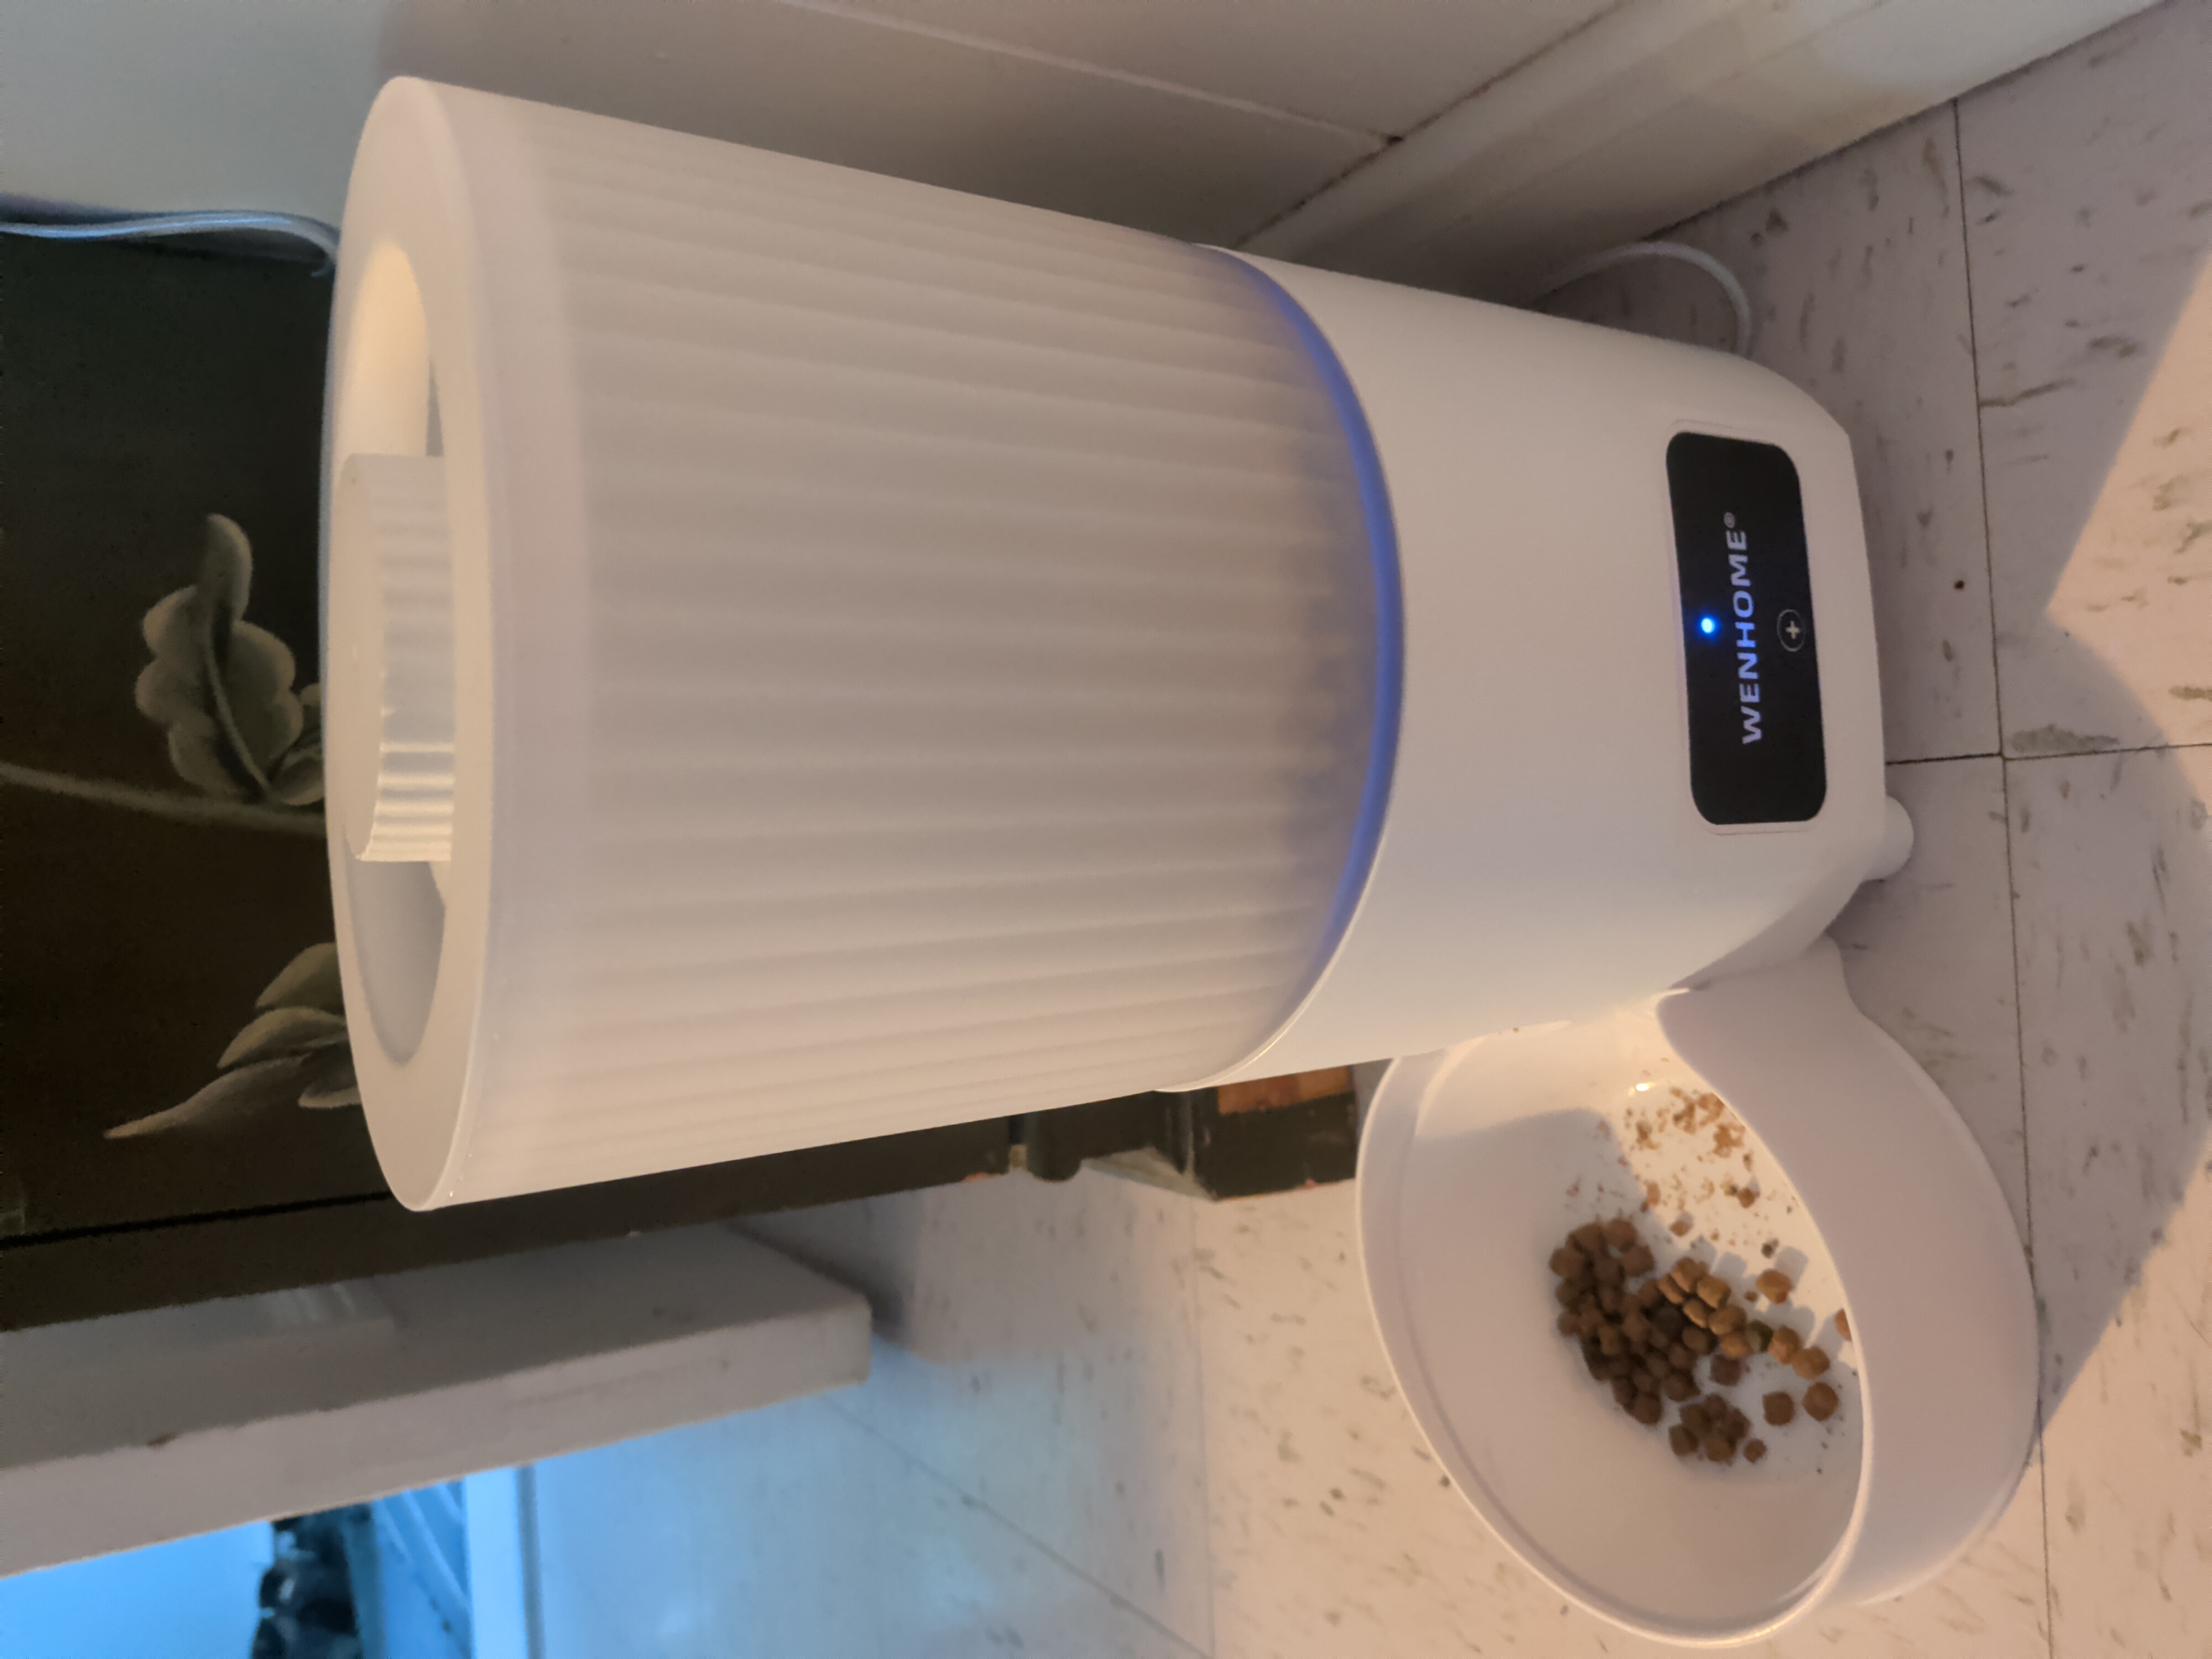
I was recently acquired by the Cat Distribution System, and decided that it would be fantastic to be able to feed them from the comfort of my own bed, so I ventured online to find where I could purchase the finest, cheapest piece of hardware that would satisfy requirements. I finally landed on the WENHOME Automatic Cat Feeder, for a few reasons:
- The product images show that it uses the Smart Life app, which is from one of my favourite manufacturers, Tuya.
- At less than 60 bucks, I could afford to brick the whole device as a sacrifice to the Gods of the Magic Smoke, should I inadvertently find myself offering it up.
- Should the hardware turn out to be more complex than I'd thought, I could at least integrate it into Home Assistant and take local control using a local-first approach (although there seems to be a few competing ways of doing this created by the community).
You can find the firmware that I came up with at this link.
Why Bother?
There's a bit of a irony when it comes to "smart" internet-connected devices in that many of them offer a bad interface, a poor experience, and an inconvenient way to control things, while coupling it with a dependence on cloud servers which will some day go offline. For something like this, that's really unnecessary: an app on my phone I don't want or trust, with permissions I don't want to grant it, talking to a cloud I don't control.
Disassembly

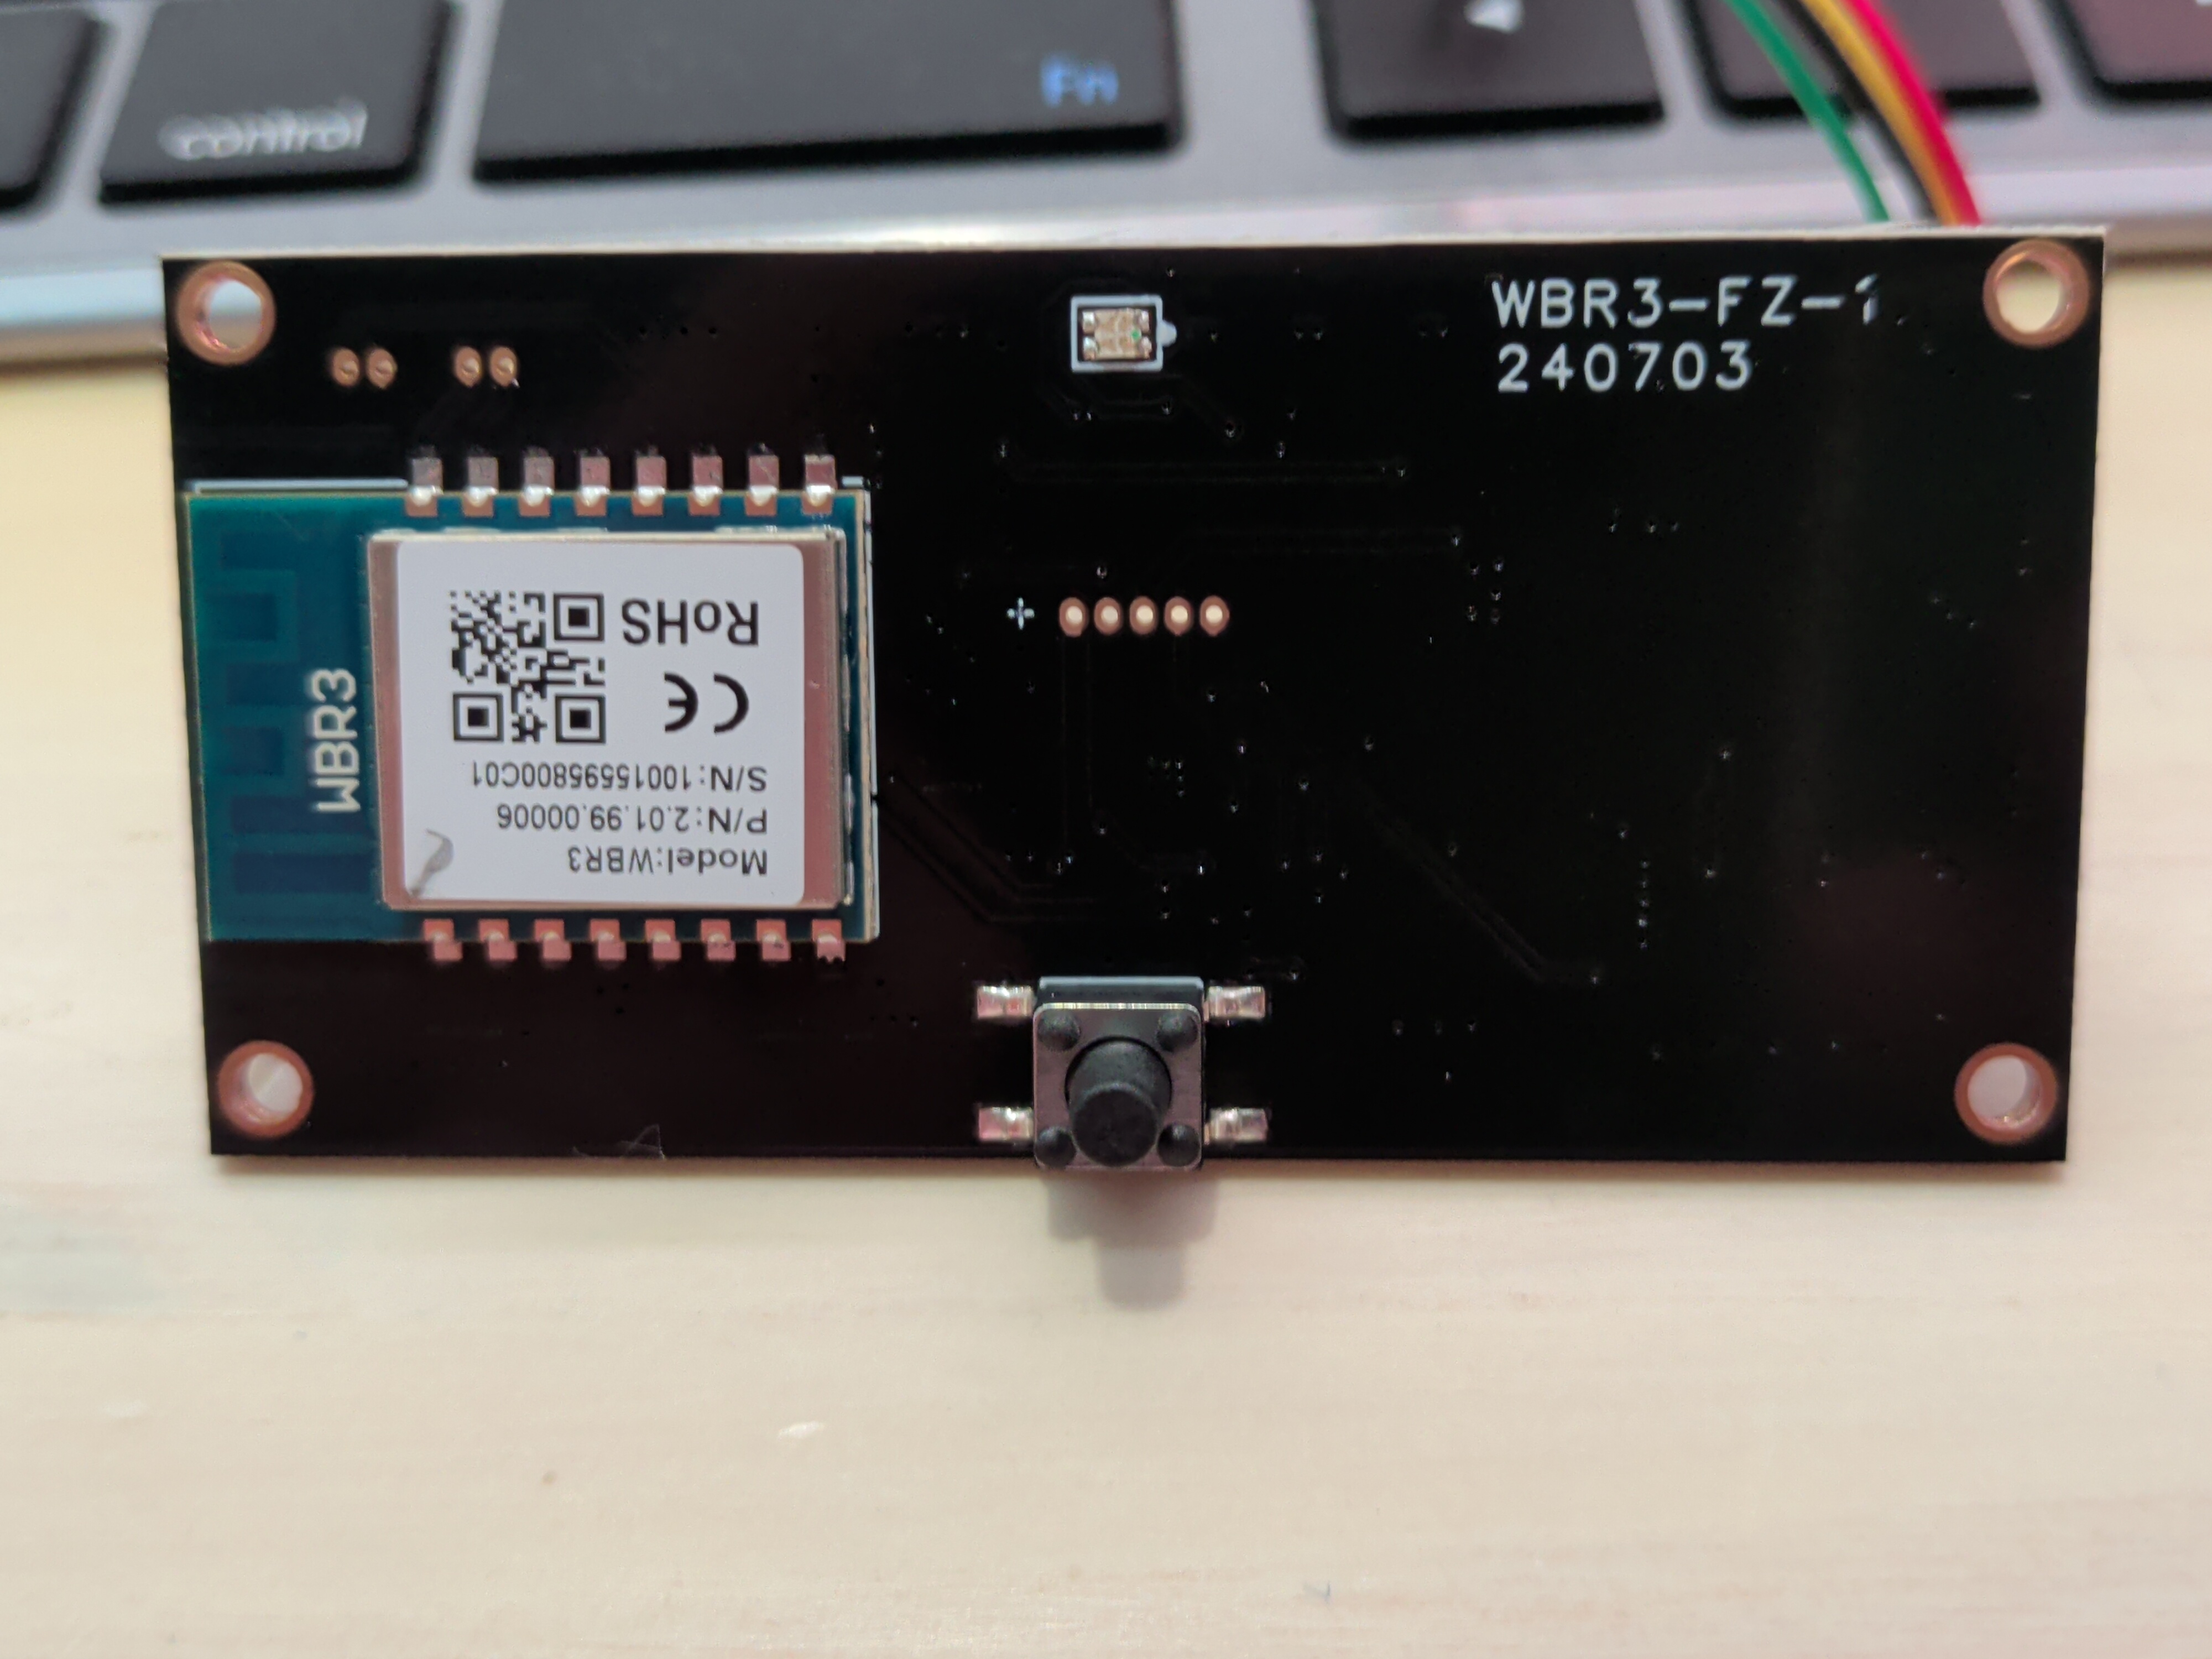
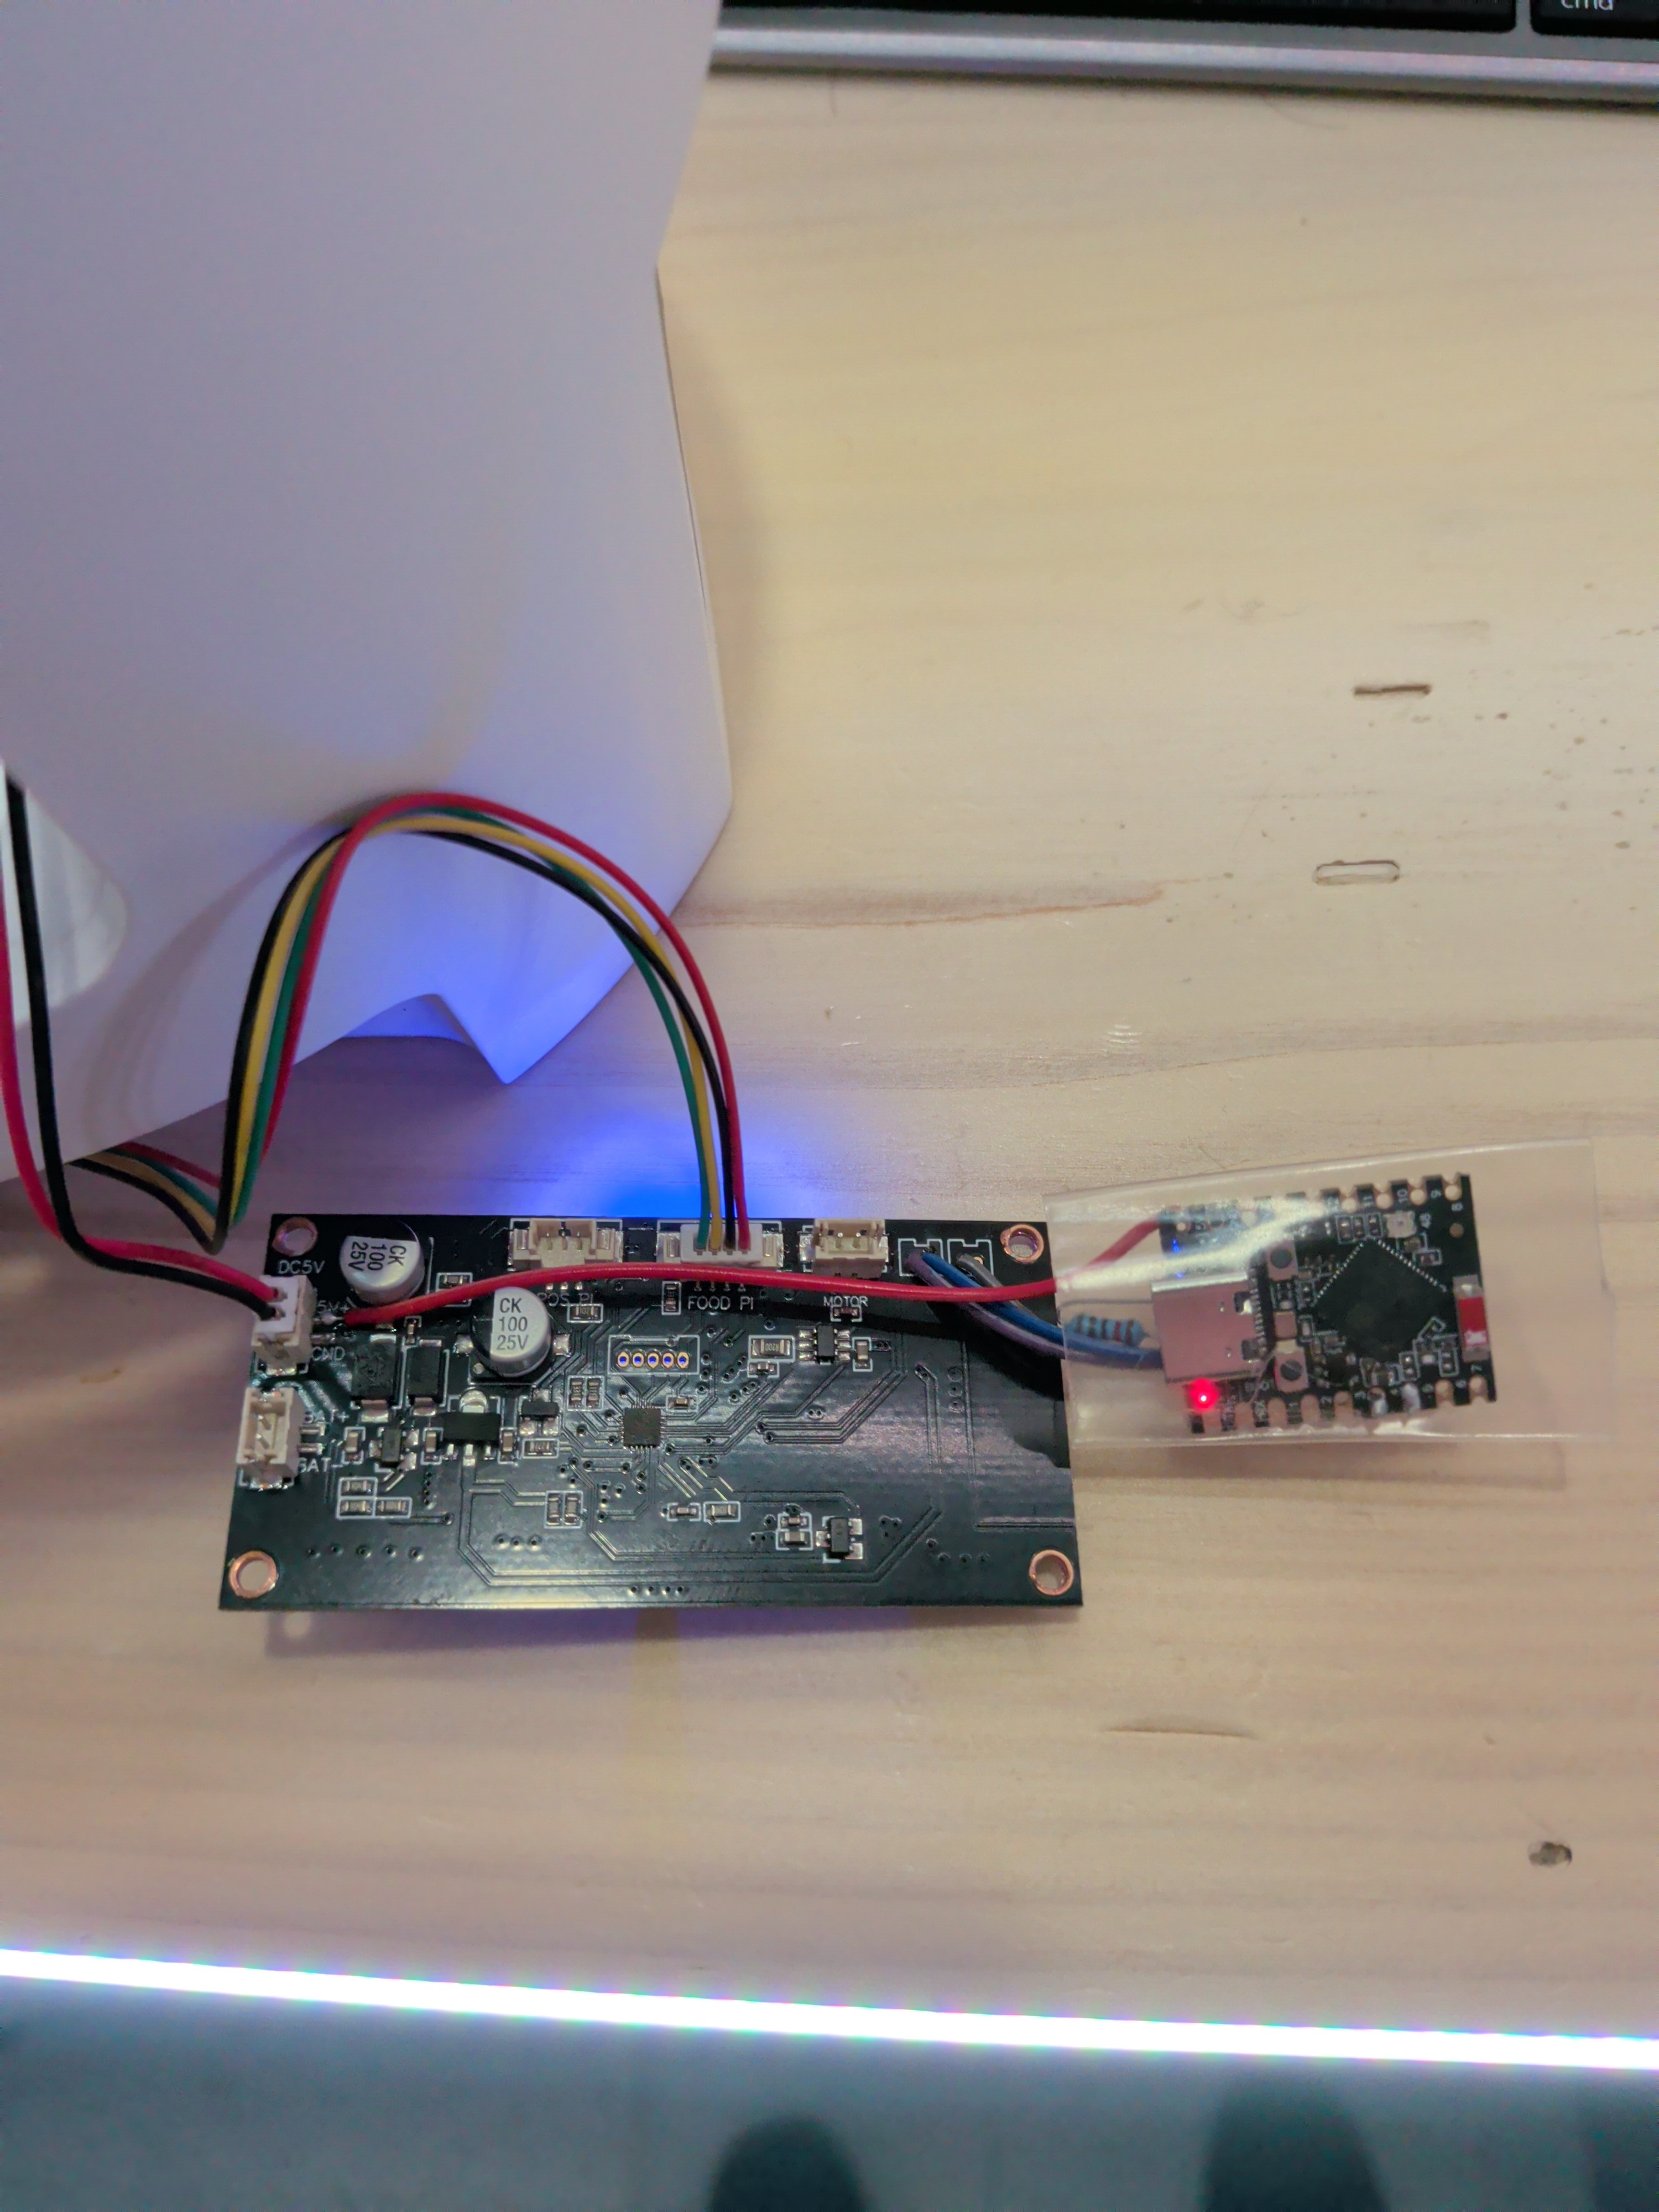
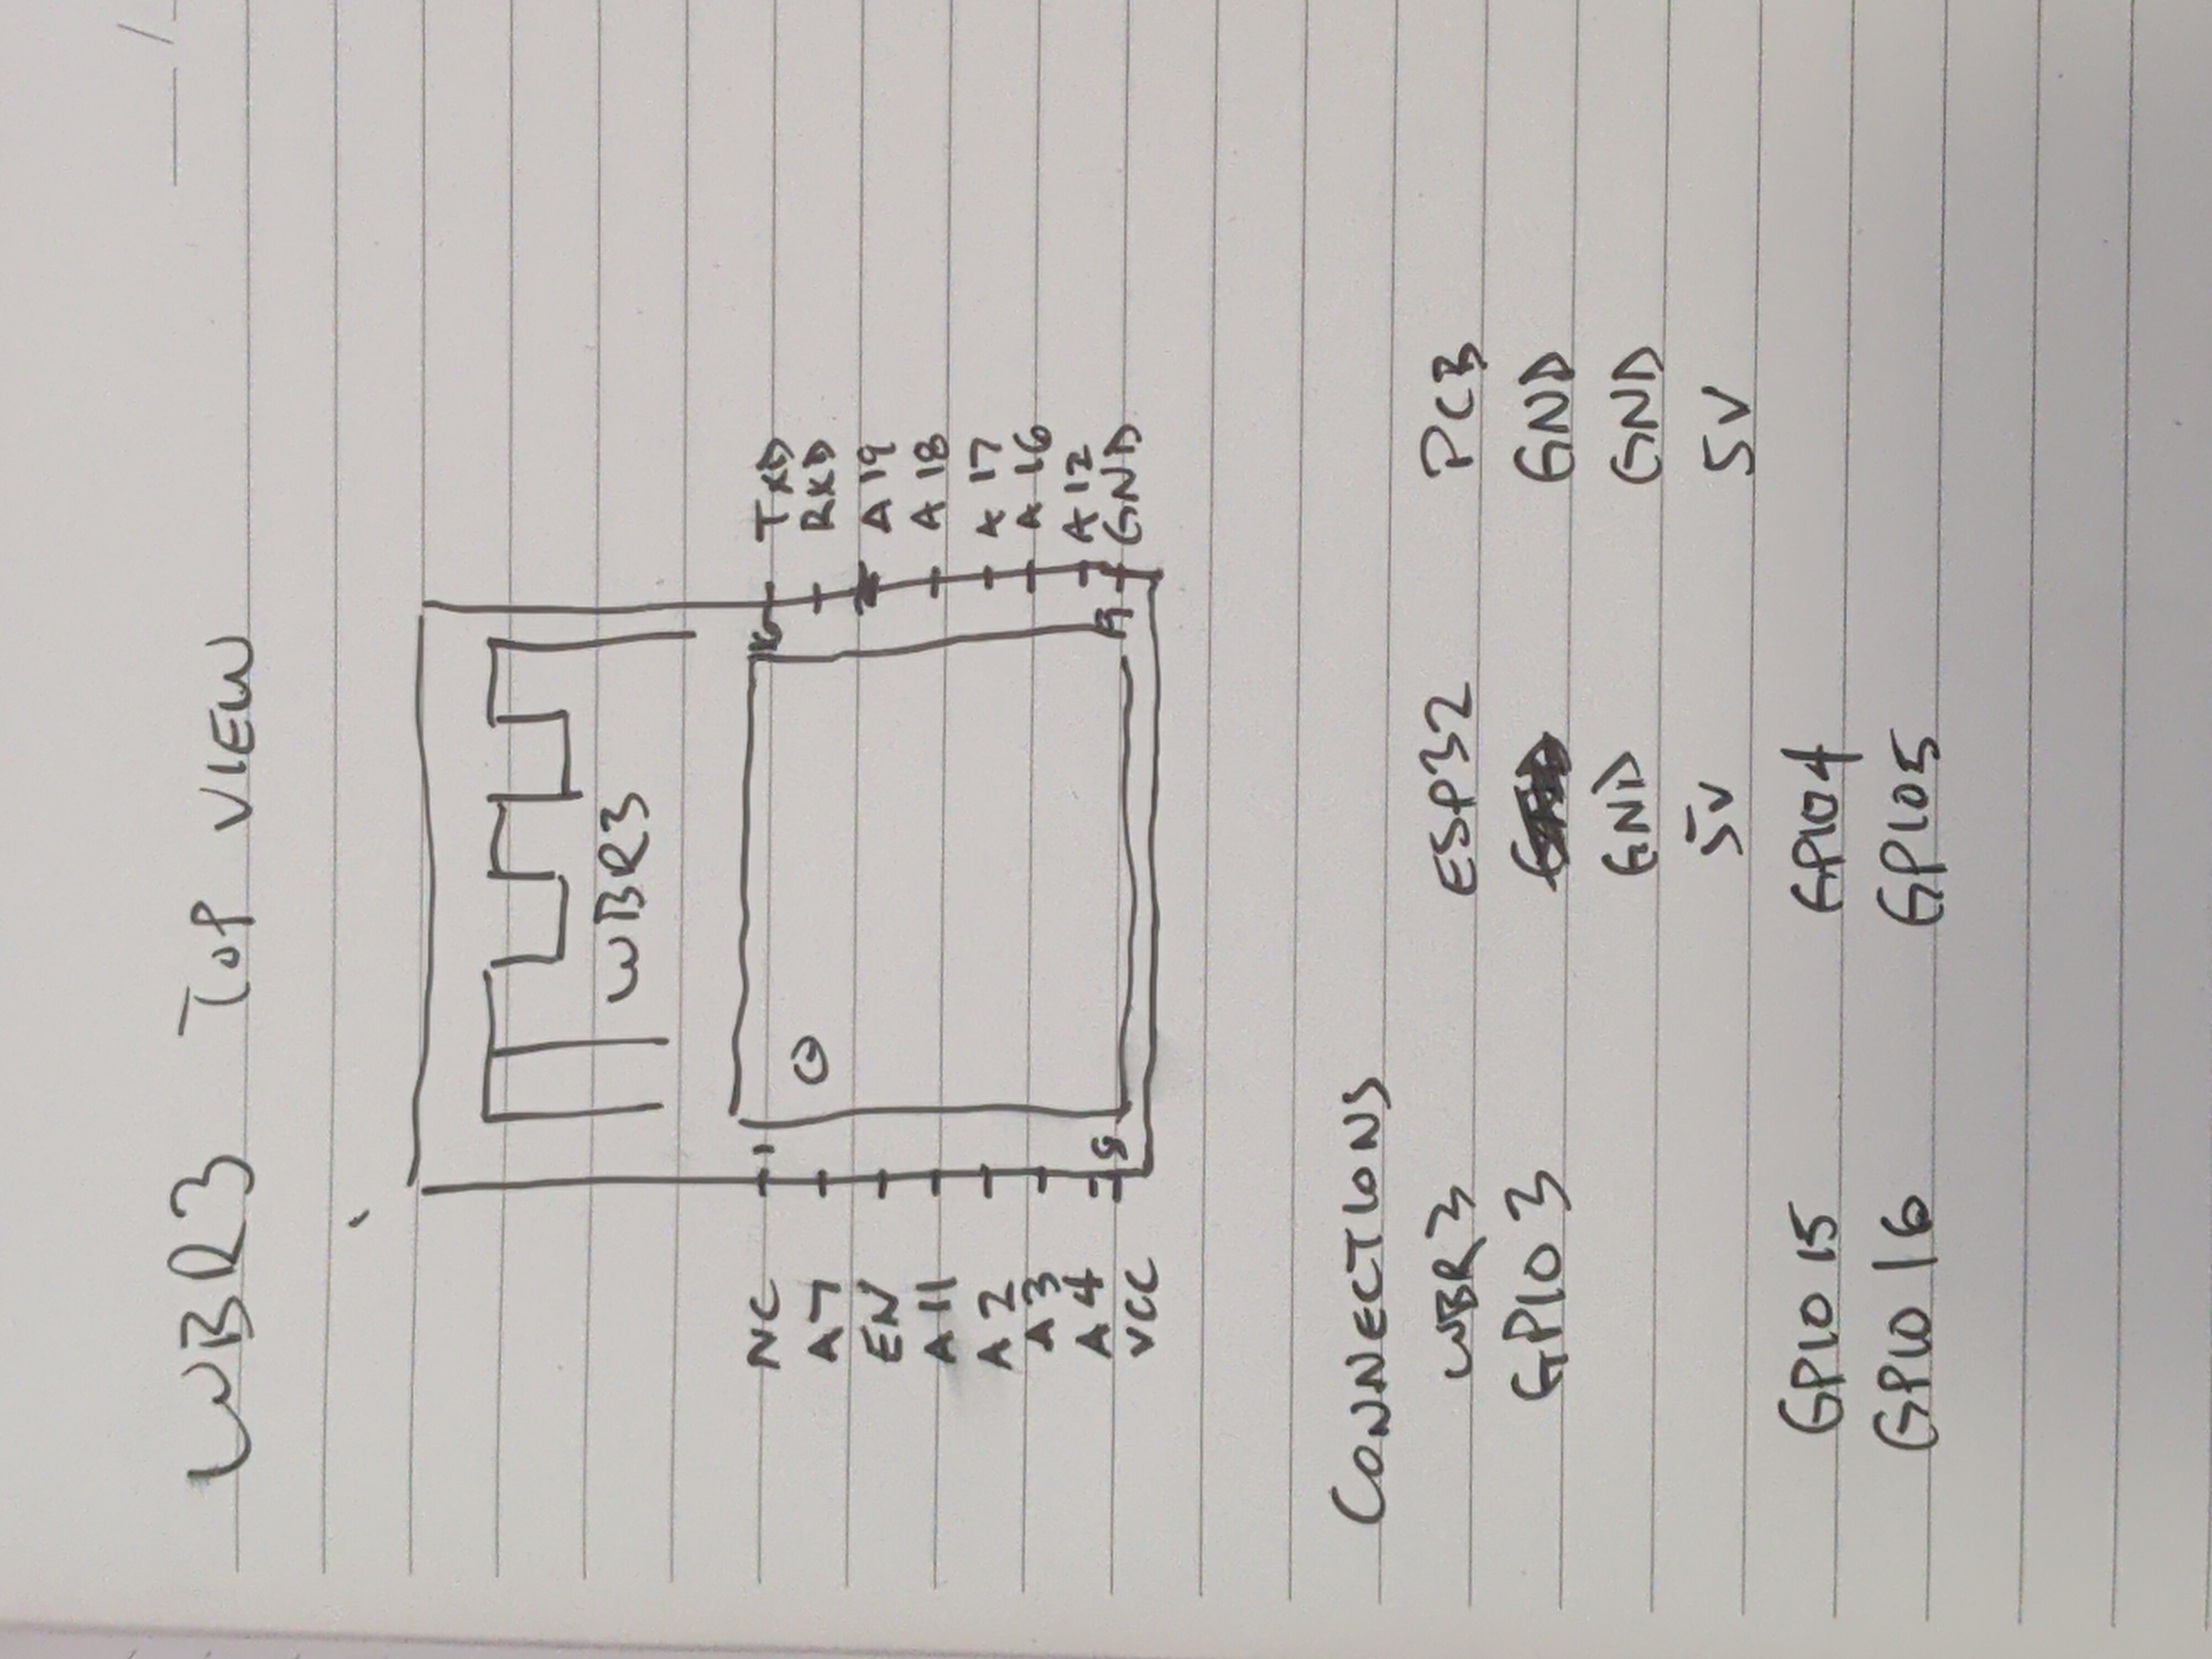
The first thing I did, once the feeder was delivered, was to flip it over and disassemble it. Turned out to be just a lot of #1 philips screws, some nested deeply, but easy enough to take apart. Once I got a look at the circuit board, it revealed a WBR3 wifi module on one side, and a lot of active circuitry and what appeared to be a small QFP package - the PY32 microcontroller and it's corresponding controls and sensors.
Separate Responsibilities
This separation pointed at a specific, modular approach: the on-board microcontroller handles everything device-specific, and uses a UART bus to communicate with a separate wifi module, which handled only the cloud connectivity work. This two-chip separation offers a fantastic approach to modifying the hardware: disabled the wifi module, and just take over its side of the UART communication.
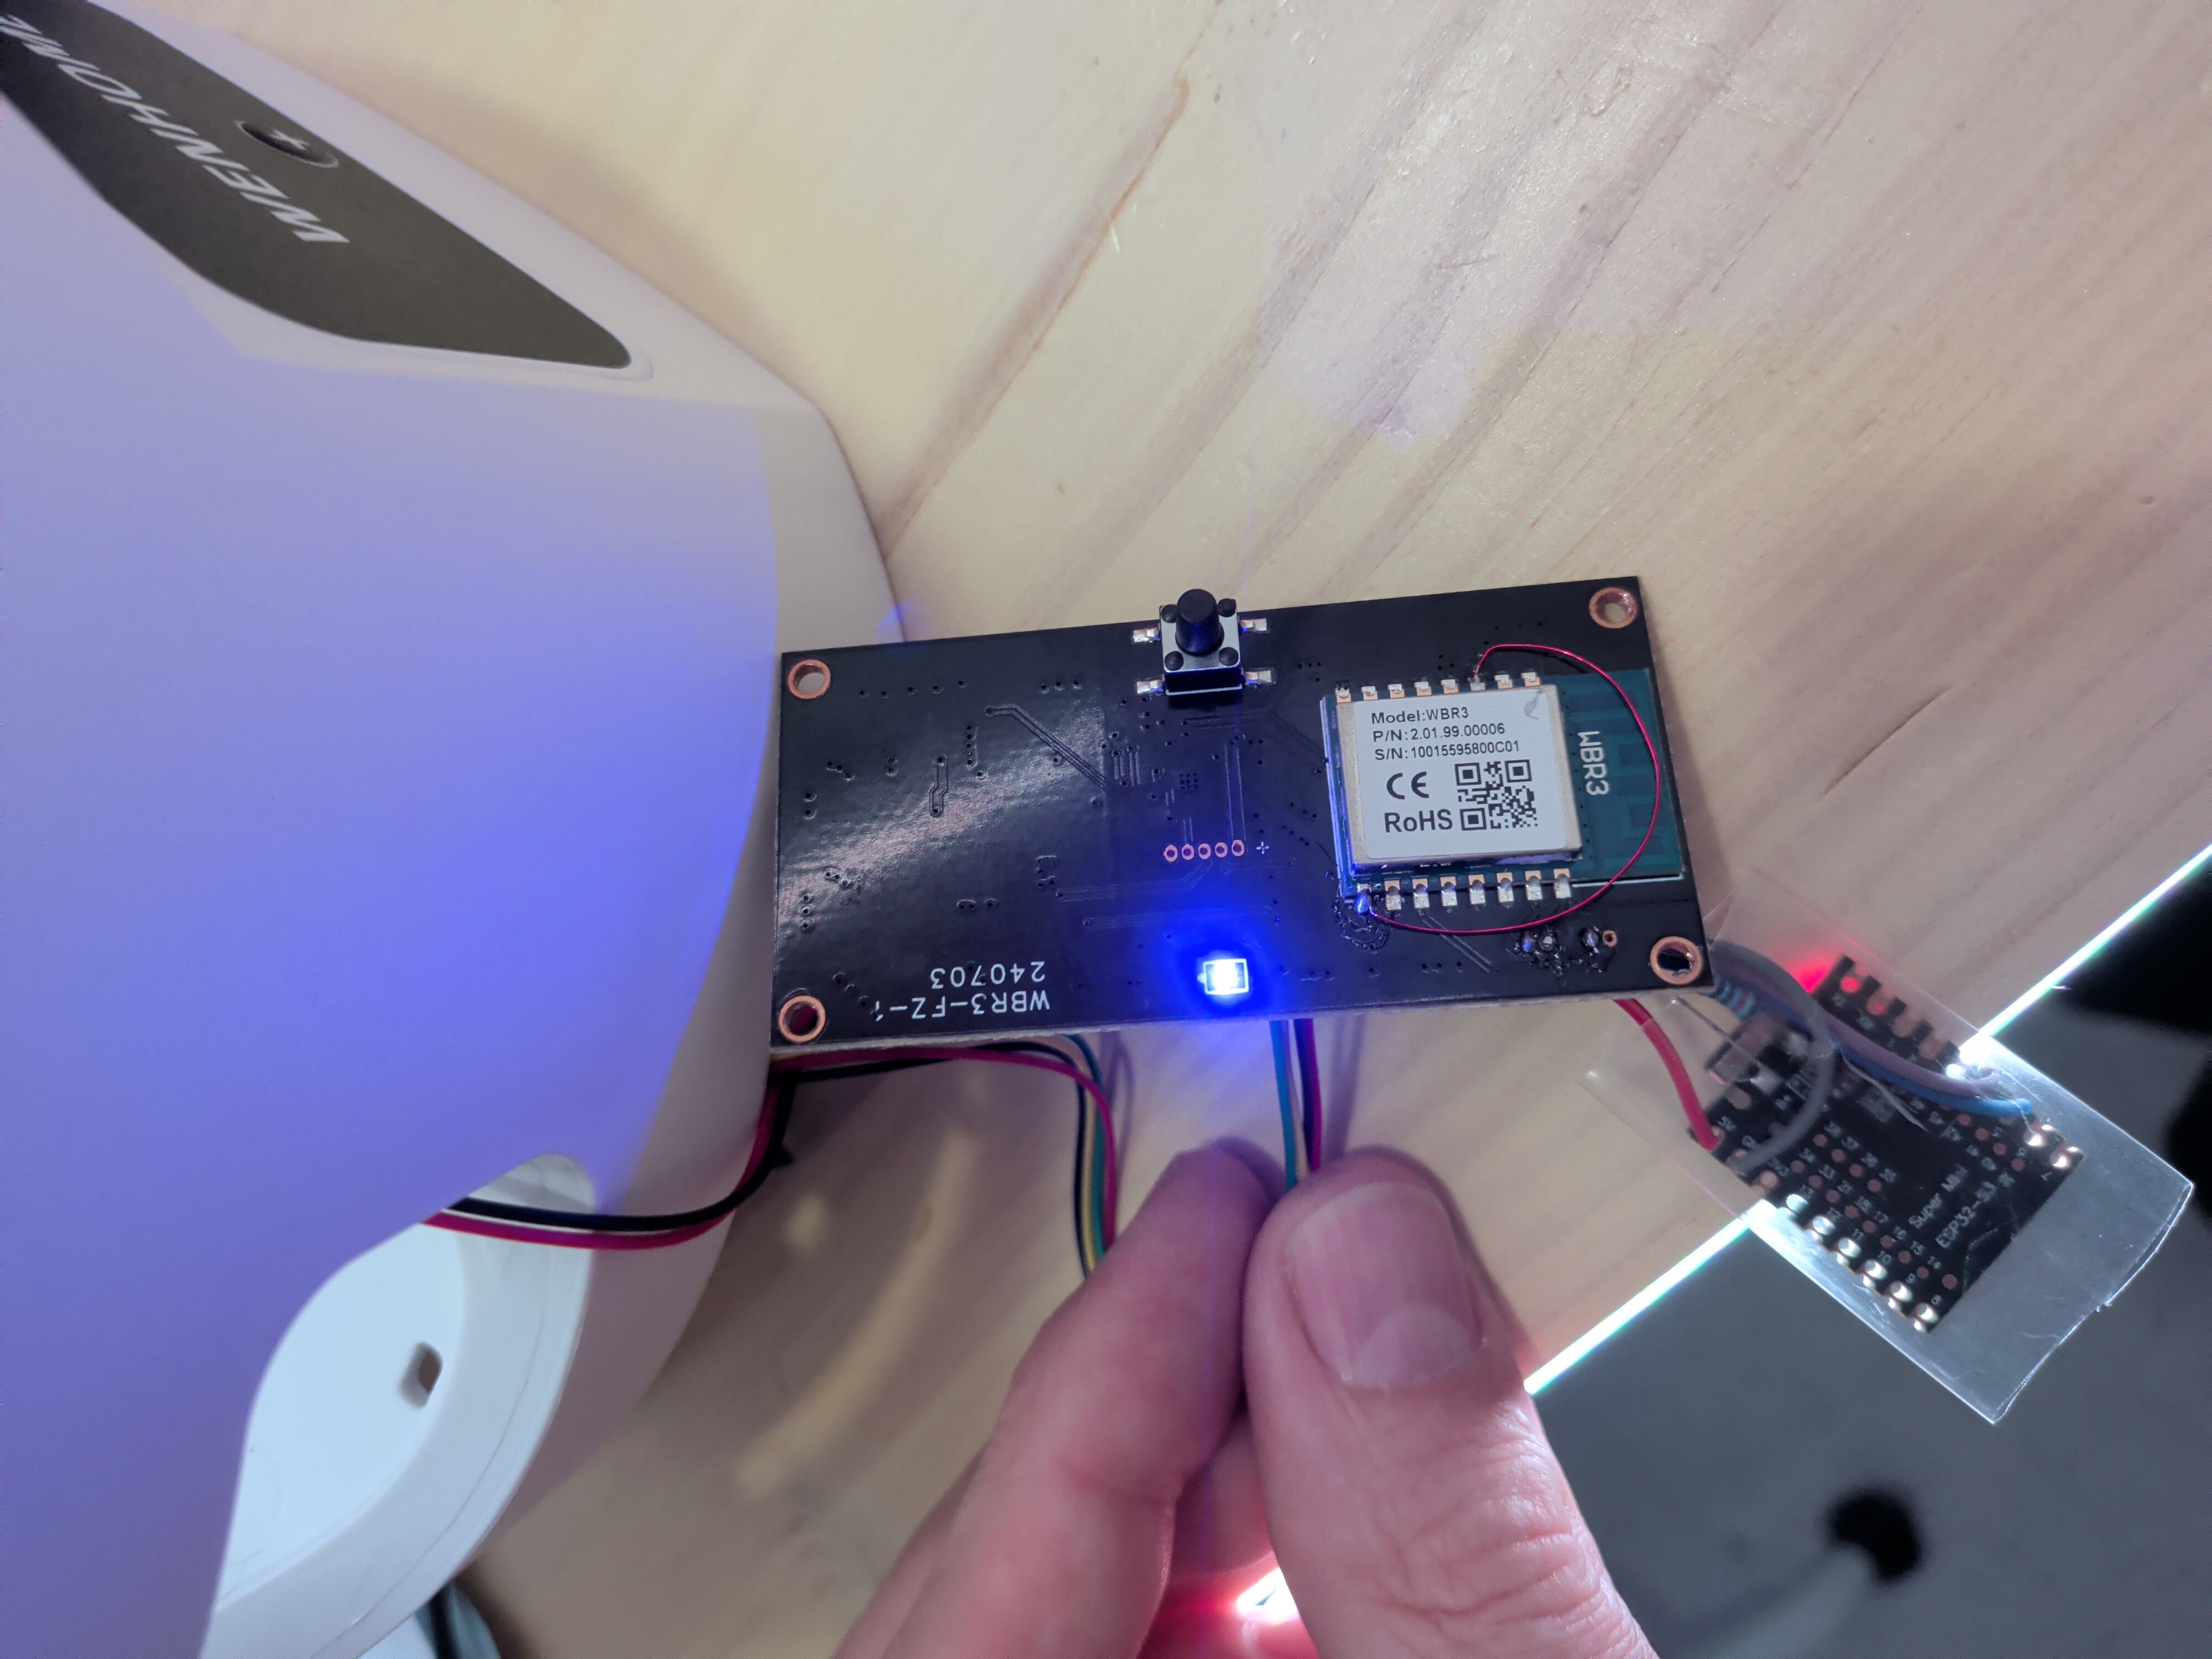
Adding an ESP32 turned out to be simpler than I'd anticipated, only 5 actual connections required:
- Connect EN and GND on the WBR3 module (disable the WBR3)
- Connect the USB power supply 5V input to the ESP32 S3 5V (the on-board 3.3v adapter cannot supply enough current for the ESP32)
- Connect the USB power supply GND input to the ESP32 S3 GND (common ground required)
- Connect the ESP32 S3 GPIO4 to the WBR3 module tx pin
- Connect the ESP32 S3 GPIO5 to the WBR3 module rx pin
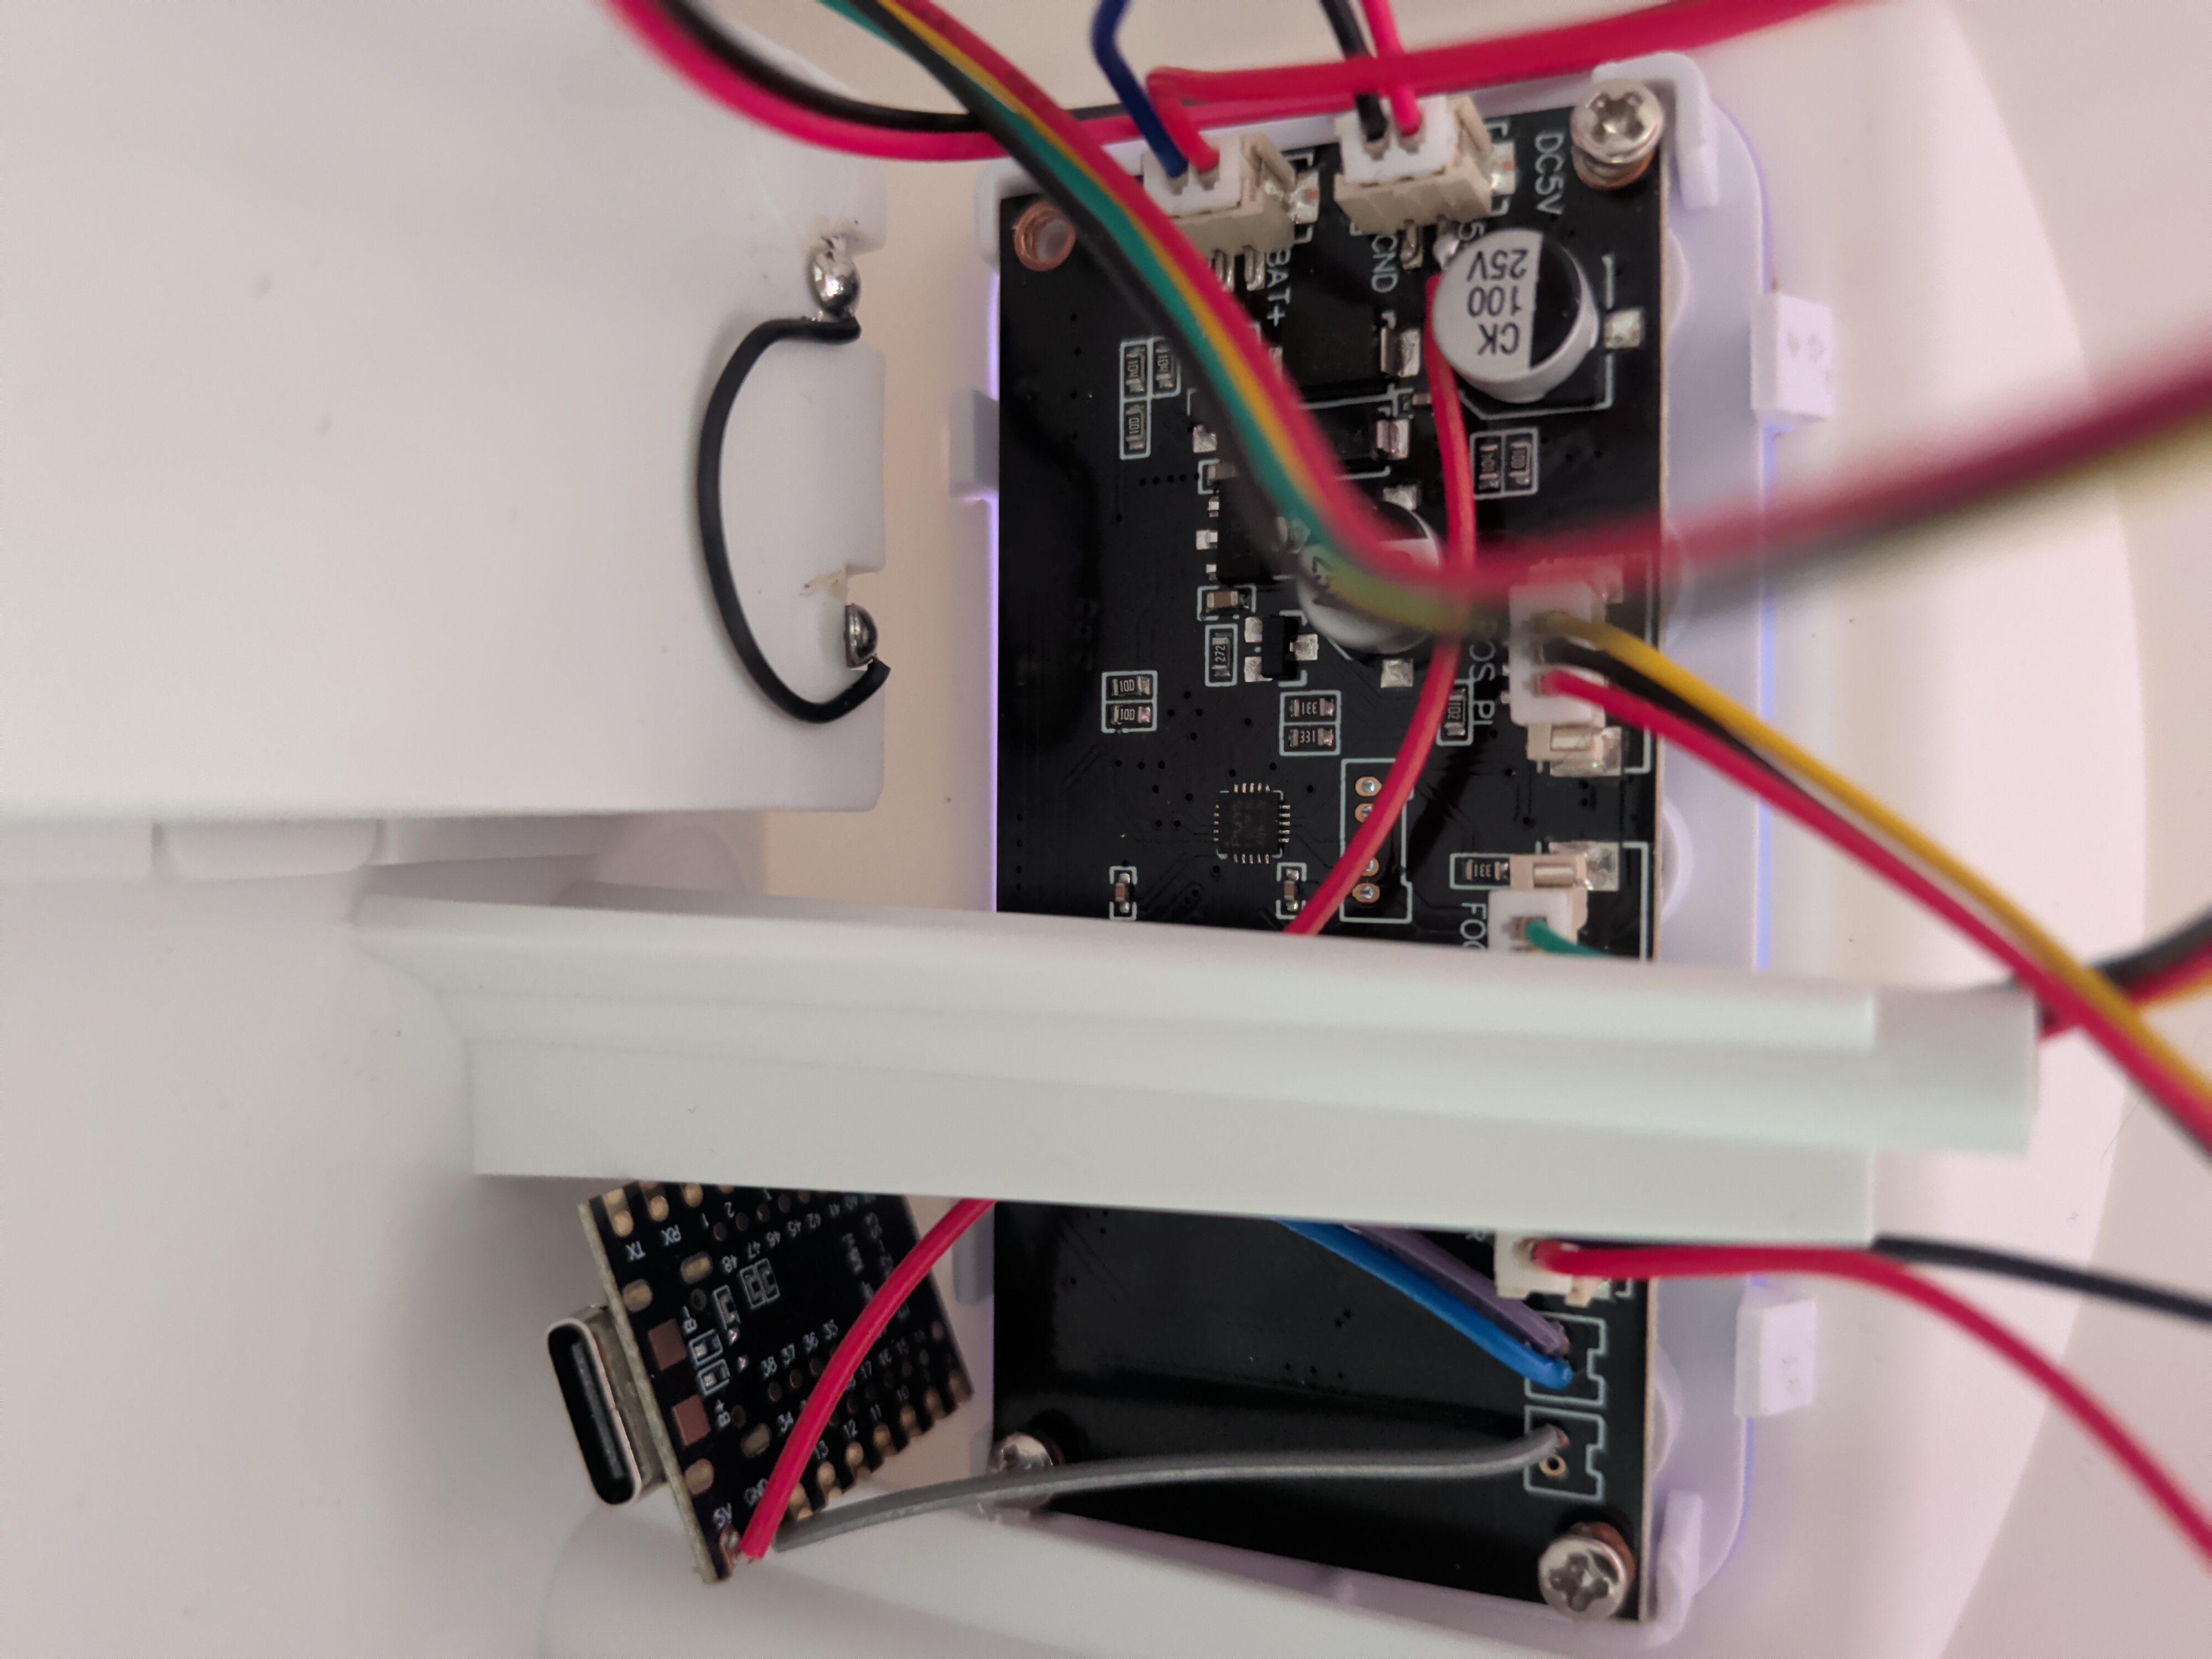
I prepared an ESP32 S3 super mini with a base esphome config, connected the pins, and buttoned up the device again.
Speak the Protocol
Because of the hard work of many other contributors, the esphome project already speaks the Tuya protocol. This means that the actual firmware we need to write for our device is pretty simple - we just need to put a UI/UX around the tuya protocol, and replace "the cloud" with Home Assistant.
The biggest challenge I encountered was saving the schedule data. The microcontroller has no way to return the data about what's currently saved in the schedule (that I could find), so I had to take a separate approach. Instead of saving the schedule data to the cloud, I opted to save the schedule to the ESP32's non-volatile storage, allowing me to access and render it in a web UI, make edits to existing entries, and save it to the MCU so that it continues to execute on schedule, even if the power goes out and the esp32 is off.
This is the real win for me - I've managed to retain the features of the firmware that I like, while disconnecting everything from anyone else's cloud service.
Write the Configuration
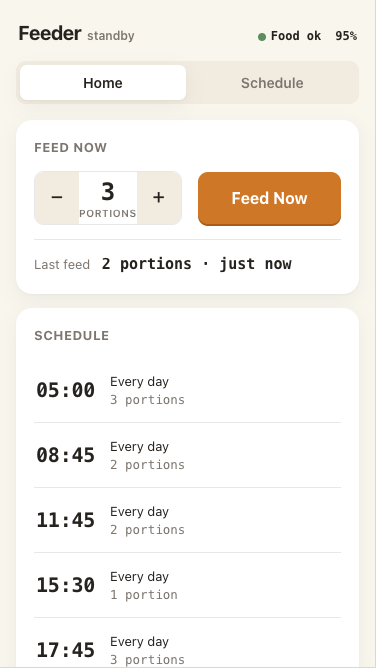
The configuration for this device was, in theory, pretty simple and straightforward, but I couldn't help myself. I wanted a nice user interface for managing the schedule, and for this purpose, it felt appropriate to put the UI directly on the device itself. Nothing too complex, just enough to see and manage the scheduled amount and times, and a way to trigger the feed action, and view the state of the sensors. I ended up with a a handful of files: the yaml configuration, a simple h header file, and a small js file to run the web ui.
The Web UI
The web view is a simple Javascript application that shows the amount to feed, a "Feed Now" button, and the schedule. There's a second tab that allows editing the schedule. That's it. It really doesn't need anything more than that.

The outcome is precisely what I was hoping for: a locally controlled, simple, reliable device I can set up, then forget about until I need to put more food in it. One that I'm confident won't be turned into a part of a botnet. One that doesn't require an app on my phone that has permission to access my location. One that just does what it needs to do, the way I want it to do it.
This has been one of my most enjoyable hardware hacking projects, just based on how the original product was designed. It's almost as if the engineers who created this design built it so that people like me would have a great time modifying this hardware.